Old FinderCam Manual
Align To Telescope:
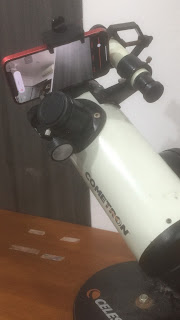
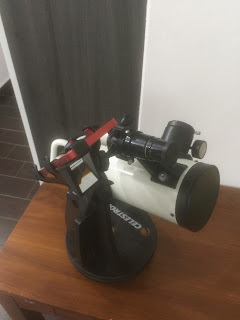
FinderCam works by using your iPhone as a finder scope mounted on your telescope.
1. Attach phone to telescope with a suitable adapter-holder.
2. Point your telescope at a distant object e.g. lamp post or tree.
3. Adjust the adapter and phone slightly until the distant object and app crosshair come together
4. Now your phone camera and telescope are aligned to point at the same object.
Align to Star:
FinderCam can also tell you what star you are pointing. It can also direct you to faint Messier's objects. FinderCam automatically aligns to bright stars as you approach your target.
1. Tap Search button and select a target eg. M42.
2. Move your telescope along the green guide path.
3. Once you reach the end of the path, tap Solve for fine alignment.
Using Tripod and iPhone only:
If you want to photograph the MilkyWay or Andromeda galaxy M31 using only your iPhone, you don’t need to do any alignment.
1. Attach iPhone to a tripod using a suitable holder.
2. Tap Search button and select M31.
3. Follow the green guiding line to M31.
4. Switch from FinderCam to MilkyCam app so your iPhone can operate with unlimited exposure time on M31.
Tips:
- Try to keep at least a distance of 5m from concrete high rise buildings. Large concrete structures affect the magnetic accuracy of the phone.
- Keep away from telecommunication antennas.
- Use Custom Coordinate in Search to enter comet or meteor shower locations found on the astronomy web. The app will lead you to them.
- To remove the green guide path after you get to the target, tap search button and swipe down on the screen to close the search page.
- For exploring the universe, tap the Model button for the sky map. Tap a sky object in the sky model. The object name will be displayed. Tap the object again to display a green path direction. Tap again to remove the path.
Stories:
1. When I got my Firstscope, it took me about 2 hours to find Saturn. As I am short-sighted, I could not see where Saturn was in the finder scope. I developed FinderCam so that I could see Saturn on the phone camera and move my telescope to Saturn easily.
2. As I moved on to find Andromeda M31, it usually took me at least 45 minutes. Sometimes I just gave up the search. With FinderCam, I can align the app to my telescope. Then I use Search to guide me to M31. As I move my telescope, it passes and aligns to Mirach. Then the path is updated and leads accurately to M31.
Right Angle Lens Mode:
1. Go to Setting.
2. Switch on Right Angle Lens Mode.
3. You will need the Right Angle Lens shown below. Cost US$3 in online marketplace eg. Shopee or Aliexpress. If you use a different right angle lens, email me with a photo. I will provide an app update.
4. Attach your phone to the telescope with a bike phone adapter shown below. Cost US$3 online.
5. If you need me to buy the accessories in 4 and 5, contact me at ustransit74@gmail.com. Alternative, you can use FinderCam without the right angle lens. In which case, you will only need a suitable phone to telescope adapter.
Watch video at https://youtu.be/7SQYET0236Q
The right angle lens makes using the iPhone easier on a telescope. You will still need to align telescope to camera using the Scope button. You can switch back to the normal lens mode by turning off the Right Angle Lens mode in setting.
Remark:
Read about the differences between PushToCam and FinderCam here.


Comments
Post a Comment